How to make great panorama photos with any digital camera
Part II / II: Stitching digital camera photos into panorama photos
The second part of the tutorial looks at putting the separate photos together seamlessly into a single panorama on your computer, this is often called panorama stitching. The first part looked at the best way to take a panorama photos using any digital camera.
Edited: 19 August 2013
Addition to my original 2008 article. I now create almost all my panoramas (previews) with Microsoft Image Composite Editor (ICE). ICE works much quicker and 90% of the time I don't have to edit the generated results. When it doesn't automatically stitch correctly I use the instructions below to fix the specific issues of the generated panorama.
Stitching Panorama Photos Using Adobe Photoshop CS
I use Adobe Photoshop CS to manually stitch or correct panorama photos. This method can also be used in other programs. At the bottom of this article there are brief instructions on how to create panoramas with the free open source image editor GIMP.Adobe Photoshop offers functionality to stitch panoramas together automatically (File > Automate > Photomerge...). You can use this for the initial layout, but as with all the other automated panorama stitching software I've seen, most panoramas still need manual retouching. In this photo stitch tutorial I'm making the entire panorama manually for the best result.
- Open all the individual photos that will form your panorama.
- Select your starting photo. It doesn't really matter whether this is the first photo of the series, the last, or one from the middle.
- Create a layer from the background
(In the layers palette right click layer and select 'Layer From Background...')

- Enlarge the canvas size
(Image > Canvas size ...)You can guestimate the size of your final panorama. It doesn't matter if you get it wrong, as if you run out of canvas you can always increase it later. Make sure to set the right anchor depending on the position of your starting photo in the panorama. Don't forget to increase the vertical size a little too as the horizon may not be at exactly the same level for each photo.

- Save your intermediate work as a .PSD file to avoid accidentally overwriting your JPG file half way through.
(File > Save as...)
- Copy and paste the adjacent photo into your PSD file.
- Set the opacity of the pasted layer to 50%.

- Position the semi-transparent layer for it to match the background in a vertical column. Moving the picture around will make it easier to see when you have a good fit.

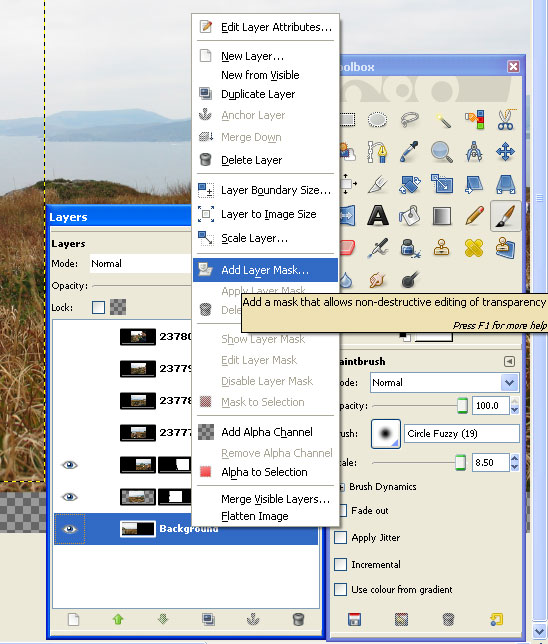
- Add a layer mask to the transparent layer by clicking on the 'Add layer mask icon':


After adding the mask you will see the mask thumbnail next to the layers thumbnail
- Select the gradient tool [G]

Apply the gradient to your photo on the area that you lined up with the underlying photo. If you find your gradient erases the wrong side of your picture you can either reverse the front and background colours (X) or reverse the direction you pulled the gradient in.
Most pictures work with a vertical gradient - you can ensure the gradient is vertical by holding down the shift key - or slightly slanted gradient. The advanced panorama stitching section gives some tips and tricks to work with objects in the foreground.

- Set the opacity of the layer back to 100%.

- Repeat steps 6 - 12 for all remaining photos.
- Finally create a selection to crop the panorama photo into shape
(Image > Crop ...)
Advanced panorama stitching
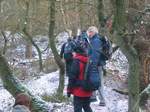
After creating the gradient on the layer mask you can adjust this by drawing onto the mask. Black erases parts of your layer and white paints your layer back again. This will allow you to fine tune how your panoramas are stitched together and fix any visible seams. Make sure you select a 'soft' brush for best results.The following example shows the stitch with only a slanted gradient. You can clearly see that the frying pan next to my boots is off. This can be easily fixed by painting on the layer mask.

To show the end result below is a screenshot of only the right hand side photograph after adjusting the layer mask:

Final panorama seamless stitched including a whole frying pan:

Panorama stitching using GIMP
I don't use GIMP very often and there are quicker ways of doing some of these things. There are plugins available which do part of the stitching process automatically. All you need to do is the fine tuning in the end. These instructions show the old fashioned manual way using GIMP 2.6.3. Follow the instructions as for Adobe Photoshop, but use the following commands/shortcuts.- Use File > Open as layers to open all the photographs that will form your panorama.
- Resize the canvas with Image > Canvas size
- Right click the image in the Layers panel and select 'Add layer mask'. You can select the mask by clicking on it.
- Use the Blend Tool (L) to create the gradient
- Fine tuning can be done using the Paintbrush tool (P)